Soft Roti Masterclass
Key Tips
- Rest dough for 30 minutes
- Use lukewarm water (40°C)
- Roll to 6 mm thickness
- Cook on hot tawa
- Steam burst finish
Ingredients
Step-by-Step Guide
Common Mistakes & Fixes
| Issue | Cause | Fix |
|---|---|---|
| Hard edges | Rolling too thick | Roll to ~6mm; use a light hand |
| Cracks after cooking | No resting time | Rest dough 30 min; cover with damp cloth |
| Dry roti | Not covering after cooking | Stack in a towel, cover for 2-3 min |
| Sticks to tawa | Cold or wet tawa | Heat tawa until water droplets sizzle; lightly brush with oil if needed |
Pro Tip: Steam Burst Finish
After the roti puffs, quickly splash a few drops of water on the tawa, cover it for 10 seconds, then finish the roti. The short steam burst softens the surface without making it soggy—a pro tip used in Indian restaurants.
Ever wondered why some rotis turn out tough like a tortilla while others melt in your mouth? The difference usually boils down to one simple trick that most home cooks overlook. Below you’ll find the exact steps, ingredient tweaks, and timing cues that turn a regular roti into a feather‑light, soft roti every time.
Quick Takeaways
- Rest the dough for at least 30minutes - it relaxes gluten and makes rolling easier.
- Use lukewarm water (around 40°C) for a smoother dough.
- Roll the dough to a uniform 6mm thickness; too thick = hard, too thin = tears.
- Cook on a hot but not smoking tawa; finish with a quick steam burst.
- Cover cooked rotis in a clean kitchen towel to stay soft.
What Exactly Is Roti?
Roti is a round, unleavened flatbread made from whole‑wheat flour, water, and a pinch of salt, traditionally cooked on a flat skillet called a tawa. It’s a staple across North India and the Indian subcontinent, serving as the vehicle for curries, dals, and vegetables. Because it contains no leavening agents, texture relies entirely on dough handling and heat control.
Key Ingredients and Their Role
Whole‑wheat flour (atta) provides the gluten network that gives roti its structure. Water hydrates the flour; lukewarm water ensures the gluten forms evenly without over‑tightening. A pinch of salt enhances flavor and helps tighten the dough slightly, making it easier to roll.
The One‑Minute Trick for Soft Roti
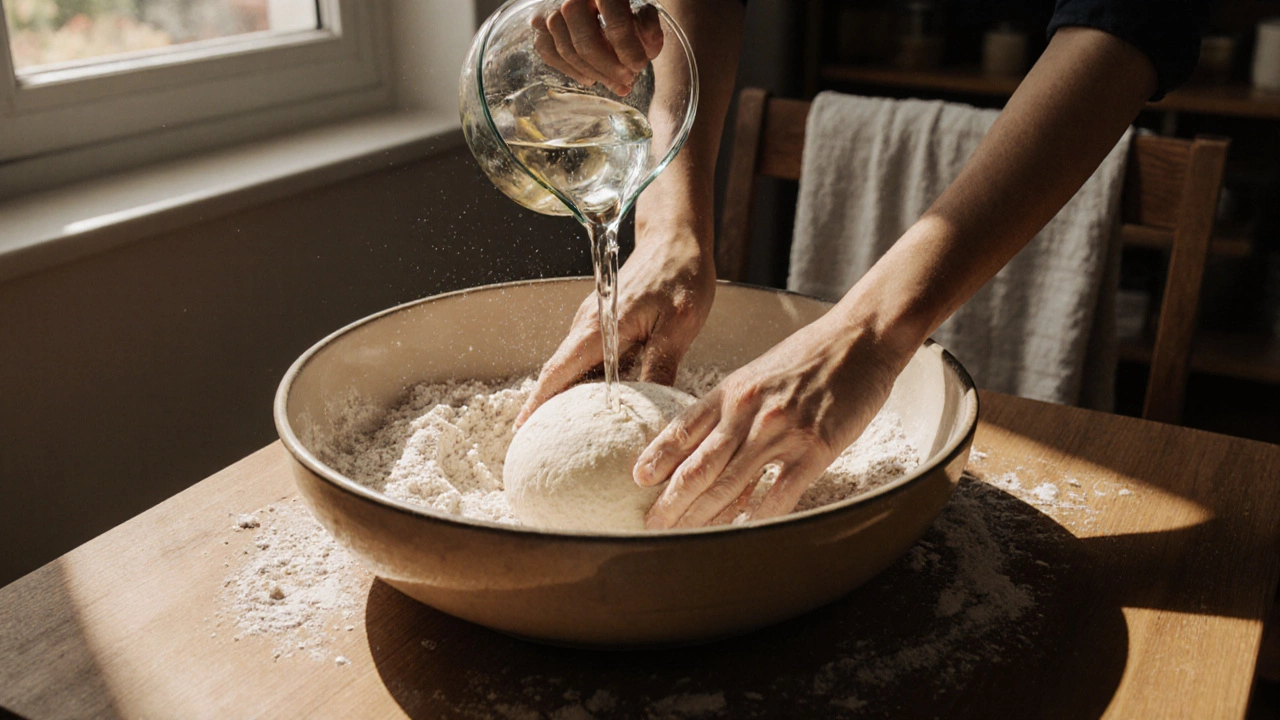
- Mix flour, salt, and a splash of oil (optional) in a bowl.
- Gradually add lukewarm water while kneading until the dough feels smooth and slightly tacky.
- Cover the dough with a damp cloth and let it rest for 30minutes. This rest period is the core trick-gluten relaxes, and the dough becomes more pliable.
- Divide the rested dough into golf‑ball‑size portions and flatten each into a disc using your palm.
- Dust lightly with flour and roll each disc to a uniform 6mm thickness. Consistency is key; uneven spots puff up into hard patches.
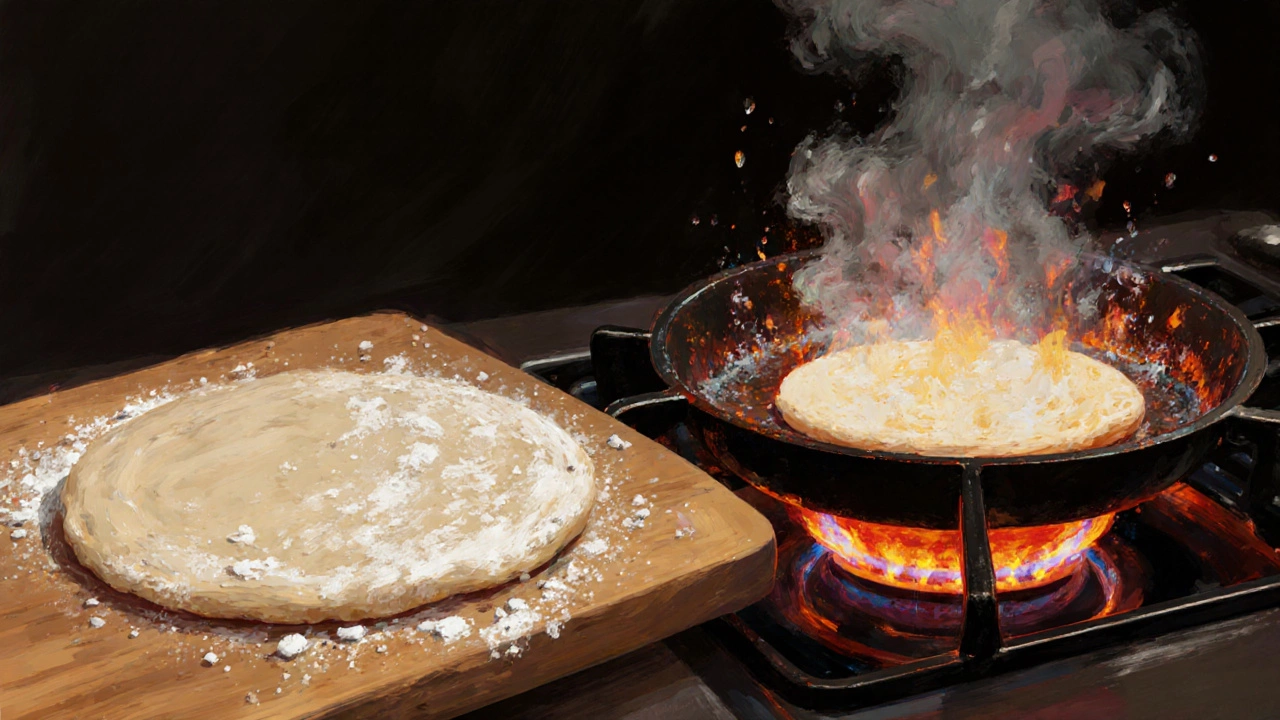
- Heat a tawa over medium‑high heat until a few droplets of water sizzle and evaporate instantly.
- Place the rolled roti on the tawa. Cook for ~10seconds until light brown spots appear, then flip.
- After the second side shows brown spots, gently press the roti with a clean cloth or spatula; this releases steam, puffing the roti.
- Immediately transfer the puffed roti to a kitchen towel, stack, and cover. The trapped steam keeps it soft.
Notice how step 3-the 30‑minute rest-does all the heavy lifting? Skipping it often results in a dough that snaps back, creating cracks and a tougher bite.
Common Mistakes and How to Fix Them
| Issue | Cause | Fix |
|---|---|---|
| Hard edges | Rolling too thick | Roll to ~6mm; use a light hand. |
| Cracks after cooking | No resting time | Rest dough 30min; cover with damp cloth. |
| Dry roti | Not covering after cooking | Stack in a towel, cover for 2‑3min. |
| Sticks to tawa | Cold or wet tawa | Heat tawa until water droplets sizzle; lightly brush with oil if needed. |

Alternative Flours: Can You Use Anything Else?
While whole‑wheat flour is classic, you can experiment with multigrain flour, millet flour, or even spelt flour. The trick stays the same-keep the water‑to‑flour ratio around 1:2 by weight and respect the 30‑minute rest. Some flours absorb more water, so adjust slightly.
Bonus: Adding a Tiny Steam Burst
After the roti puffs, quickly splash a few drops of water on the tawa, cover it for 10seconds, then finish the roti. The short steam burst softens the surface without making it soggy-a pro tip used in Indian restaurants.
Frequently Asked Questions
Why does my roti become hard after cooling?
If the roti isn’t stored in a covered container, the steam escapes and the bread dries out. Keep the cooked rotis stacked in a clean kitchen towel or place them in an insulated container for up to 2hours.
Can I add oil to the dough?
A teaspoon of oil per cup of flour makes the dough softer and easier to roll, but too much oil can make the roti greasy. Keep it under 5% of the flour weight.
What if I don’t have a tawa?
A heavy cast‑iron skillet or a flat griddle works fine. The key is pre‑heating until it’s hot enough that a water drop sizzles instantly.
Should I use whole‑wheat flour or all‑purpose flour?
Whole‑wheat flour gives authentic flavor and higher fibre, but it can make rotis slightly denser. Mixing 70% whole‑wheat with 30% all‑purpose creates a softer texture while retaining the taste.
How long can I store the dough?
The dough stays fresh for up to 24hours in the fridge. Bring it to room temperature and give it a quick knead before rolling.
Mastering the 30‑minute rest and the “steam‑burst finish” will give you the soft, pliable roti you’ve been chasing. Try it tonight and watch how your family reaches for the second piece without a second thought.