Curry Mastery Planner
Step 1: What type of curry are you making?
Select the style that best matches your recipe.
Thai Curry
Green, Red, Massaman
Indian Korma
Rich, slow-simmered base
Weeknight Quick
Stir-fry, minimal prep
Timing Recommendation
Description goes here.
Step 3: The "No-Split" Protocol
Follow these steps exactly to ensure a creamy, unified sauce.
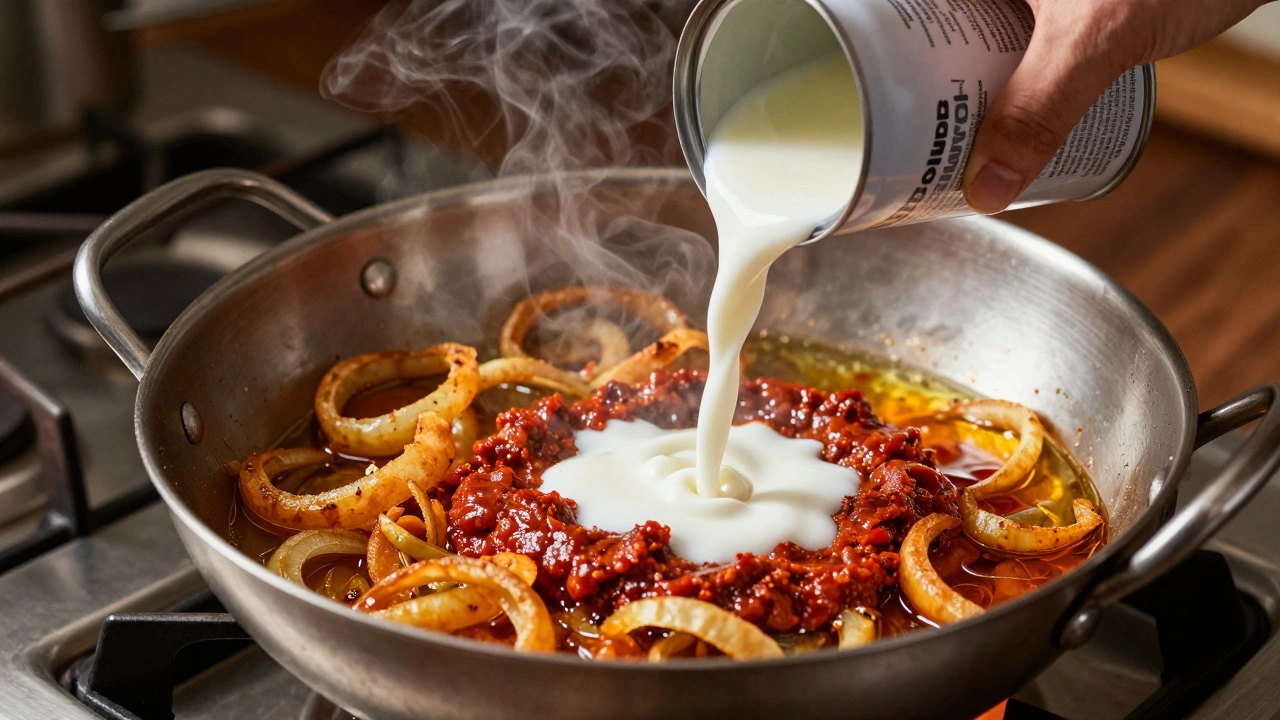
- Base Ready: Ensure onion/tomato base is cooked until oil separates.
- Temper Milk: Ladle hot sauce into cold milk container first.
- Pour Slowly: Add tempered milk back while stirring constantly.
- Lower Heat: Reduce to medium-low immediately (no boiling!).
- Add Acid Last: Squeeze lime juice only after turning off heat.
Emergency: Sauce Split?
If you see oil pooling on top, try one of these immediately:
You’ve spent twenty minutes frying onions until they’re golden brown. You’ve toasted your spices until the kitchen smells like a festival. Your chicken is seared and fragrant. And then you pour in the coconut milk... only to watch it split into oily, unappetizing blobs that float on top of your sauce. Or worse, you add it too early, boil it aggressively, and end up with a thin, watery broth instead of a rich, velvety gravy. Timing isn’t just a suggestion in curry making; it’s the difference between a restaurant-quality dish and a kitchen disaster.
Adding coconut milk at the wrong stage can ruin the texture, flavor balance, and visual appeal of your curry. But when you get the timing right, you unlock a sauce that clings to every piece of meat or vegetable, carrying deep aromatic notes without feeling heavy. This guide breaks down exactly when to introduce coconut milk into your curry, why the order matters, and how to adjust based on whether you’re making a quick weeknight meal or a slow-simmered feast.
Quick Summary / Key Takeaways
- Add thick coconut cream first to build a rich base, then thin coconut milk later to adjust consistency.
- Never boil coconut milk vigorously after adding it; simmer gently to prevent splitting.
- In Thai curries, add coconut milk early to cook out raw flavors; in Indian kormas, add it late for freshness.
- If your curry splits, whisk in cold water or cornstarch slurry immediately to rescue the emulsion.
- Always finish with fresh herbs and acid (lime juice) off the heat to preserve brightness.
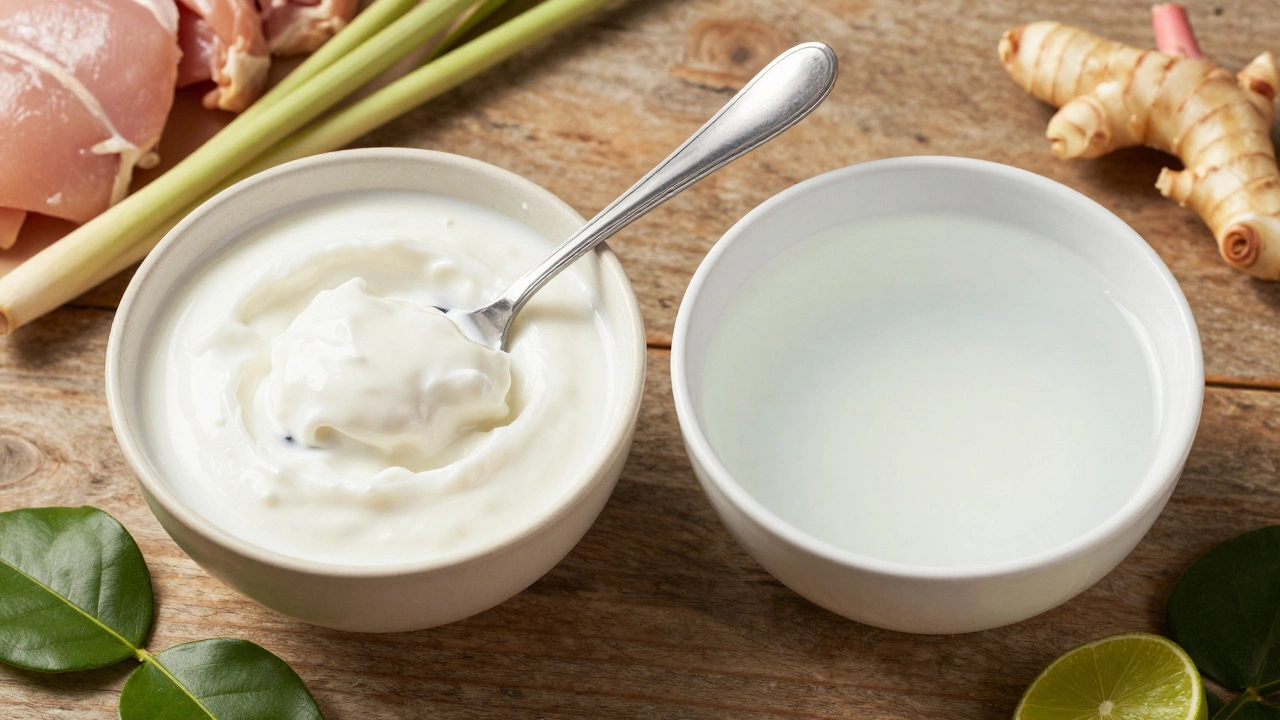
Understanding the Two Types of Coconut Liquid
Before we talk about timing, we need to clear up a common confusion: not all "coconut milk" is the same. Most cans labeled "coconut milk" contain two distinct products layered by density. At the top sits Coconut Cream, which is the thick, white, high-fat portion that rises to the top when the can sits undisturbed. Below it lies Thin Coconut Milk, the thinner, more watery liquid mixed with some fat. In many recipes, especially traditional ones, these are used separately because they serve different purposes.
Coconut cream has a fat content of around 20-25%, while thin coconut milk hovers closer to 10-15%. This difference changes everything. If you want a luxurious, coating sauce, you start with the cream. If you need volume and a lighter body, you use the thin milk. Using only one type often leads to imbalance-too heavy or too thin. For most home cooks using a standard 400ml can, shaking it before opening creates a uniform medium consistency, but separating them gives you professional control over your curry’s texture.
The Golden Rule: When to Add Coconut Milk in Different Cuisines
The timing depends heavily on the style of curry you’re making. There’s no single universal rule, but there are strong conventions based on culinary tradition. Let’s look at the three most common scenarios.
Thai Curries: Early Addition for Depth
In Thai cooking, coconut milk is often added at the beginning of the sauce-making process. You’ll typically fry the curry paste in a little oil or coconut cream until fragrant, then pour in the rest of the coconut milk. Why? Because Thai curries rely on the coconut milk to carry the heat and aromatics from the paste. Simmering the paste in the coconut milk for 5-10 minutes allows the raw starches and harsh edges of the chili and lemongrass to mellow out. Adding chicken or vegetables happens after this initial simmer. The result is a unified flavor profile where the coconut doesn’t taste separate from the spices-it tastes integrated.
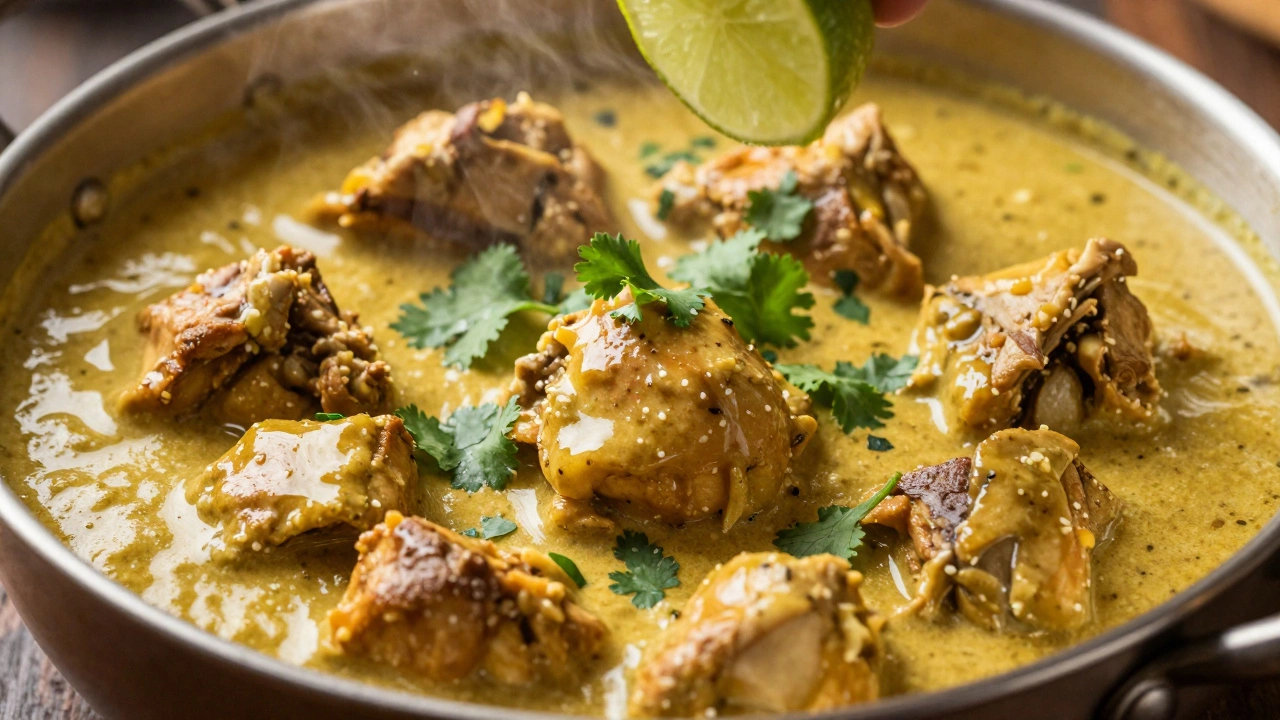
Indian Kormas and Malabar Curries: Late Addition for Freshness
In North Indian kormas or South Indian Malabar-style dishes, coconut milk (or yogurt/cream) is usually added near the end. Here, the spice base (masala) is cooked thoroughly with onions, tomatoes, and ground spices until the oil separates. The protein is then simmered in this thick masala until tender. Only in the last 5-10 minutes do you stir in the coconut milk. This preserves the delicate, sweet aroma of the coconut, which would otherwise evaporate or turn sour if boiled for too long. It also keeps the sauce glossy and prevents the dairy-like proteins in the coconut from curdling under prolonged high heat.
Quick Weeknight Stir-Fry Curries: Mid-Cook Integration
If you’re making a fast chicken curry with pre-ground spices and minimal prep, you might add coconut milk halfway through. Brown the chicken, add your spices and aromatics (garlic, ginger), cook for 2 minutes, then add the coconut milk and simmer for 8-10 minutes until the chicken is cooked through. This method balances speed with flavor development, ensuring the spices bloom slightly before being diluted by the liquid.
Why Timing Affects Texture and Flavor
It’s not just about tradition; there’s science behind the timing. Coconut milk is an emulsion of water and fat. Heat destabilizes this emulsion. If you boil it too hard or too long, the fat separates from the water, creating those dreaded oily slicks. By adding it later in the cooking process, you reduce the time it spends under direct heat, keeping the emulsion stable.
Flavor-wise, coconut contains volatile aromatic compounds that dissipate quickly with heat. Adding it early means you lose some of its fresh, tropical sweetness, replacing it with a deeper, nuttier, almost caramelized note. Adding it late preserves the bright, clean taste. Decide which profile you prefer: rustic and deep (early) or fresh and vibrant (late).
| Curry Style | When to Add | Primary Goal | Risk of Splitting |
|---|---|---|---|
| Thai Green/Red Curry | After frying paste, before protein | Mellow raw spice flavors | Low (if simmered gently) |
| Indian Chicken Korma | Last 5-10 minutes of cooking | Preserve freshness & gloss | Medium (avoid boiling) |
| Malabar Fish Curry | Very end, off heat or low simmer | Keep fish tender, sauce light | High (fish releases water) |
| Quick Chicken Curry | Mid-cook, after browning | Balanced flavor & speed | Low-Medium |
Step-by-Step: How to Add Coconut Milk Without Splitting
Even if you know *when* to add it, *how* you add it matters. Follow these steps to ensure a smooth, creamy sauce every time.
- Bring the Base to a Gentle Simmer: Before adding coconut milk, ensure your onion-tomato-spice base is fully cooked and reduced. If it’s still watery, the coconut milk will dilute further. Cook until you see oil glistening on the surface.
- Temper the Coconut Milk: Don’t dump cold coconut milk directly into a hot pan. Ladle a few spoonfuls of the hot curry base into the coconut milk container and stir. This raises the temperature gradually, preventing thermal shock that causes separation.
- Pour Slowly While Stirring: Pour the tempered coconut milk back into the pan in a steady stream while stirring constantly with a wooden spoon. This helps integrate the fats evenly.
- Reduce Heat Immediately: Once added, lower the heat to medium-low. Never let a coconut milk curry boil violently. A gentle bubble is enough.
- Simmer Covered: Cover the pot loosely to retain moisture but allow steam to escape slightly. This prevents condensation from dripping back in and watering down the sauce.
Troubleshooting: What If Your Curry Splits?
Don’t panic. Splitting is reversible. If you see oil pooling on top, your emulsion has broken. Here’s how to fix it:
- Blitz It: Use an immersion blender to whip the sauce briefly. This re-emulsifies the fat and water. Be careful not to over-blend, or you’ll make it gluey.
- Add Cold Water: Stir in 2-3 tablespoons of cold water while whisking vigorously. The temperature drop helps re-bind the fats.
- Cornstarch Slurry: Mix 1 teaspoon cornstarch with 1 tablespoon cold water. Stir this into the simmering curry. The starch acts as a stabilizer, holding the emulsion together.
- Acid Rescue: A splash of lime juice or tamarind paste can sometimes help rebalance the pH and stabilize the mixture, though this is less reliable than mechanical methods.
Pro Tips for Maximum Flavor Impact
To elevate your curry beyond basic instructions, consider these expert adjustments:
- Use Full-Fat Canned Milk: Avoid carton "coconut milk beverages" meant for drinking. They contain stabilizers and less fat, resulting in a thin, bland sauce. Look for brands with no additives other than water and coconut.
- Toast the Coconut: For a nuttier flavor, spread the thick coconut cream on a baking sheet and toast it at 350°F (175°C) for 10 minutes before adding it to the curry. This adds depth similar to roasted nuts.
- Finish with Acid: Coconut milk is rich and fatty. Always finish your curry with a squeeze of lime juice or a dash of vinegar just before serving. This cuts through the richness and brightens the entire dish.
- Garnish Wisely: Fresh cilantro, mint, or even crispy fried shallots added at the very end provide textural contrast to the smooth coconut sauce.
Common Mistakes to Avoid
Many home cooks fall into predictable traps. Avoid these to save your dinner:
- Boiling Vigorously: High heat breaks the emulsion. Keep it gentle.
- Adding Too Much Salt Early: Salt draws out moisture from vegetables and meat. If you salt the base heavily before adding coconut milk, the final sauce may become watery. Season in stages.
- Ignoring the Can’s Layering: As mentioned, separating cream and milk gives you control. Mixing them blindly limits your ability to adjust thickness.
- Over-Simmering After Addition: Once coconut milk is in, you’re mostly heating through and melding flavors. Prolonged simmering degrades texture and color.
Frequently Asked Questions
Can I substitute coconut milk with regular milk or cream in curry?
Yes, but with caution. Heavy cream works well in Indian kormas but lacks the distinct coconut flavor. Regular milk will likely curdle due to acidity in tomatoes or spices. If substituting, use full-fat coconut cream thinned with water for the closest match, or opt for cashew cream for a vegan alternative.
Does coconut milk need to be shaken before adding to curry?
It depends on your goal. Shaking creates a uniform consistency suitable for quick curries. However, for richer dishes, scoop out the thick cream first for frying spices, then shake the remaining thin milk for the main body. This technique maximizes both flavor and texture.
How long does coconut milk keep in the fridge after opening?
Transfer any unused coconut milk to an airtight glass container. It lasts 4-5 days in the refrigerator. If it develops a sour smell or mold, discard it immediately. You can also freeze it for up to 3 months, though texture may change slightly upon thawing.
Why does my coconut milk curry taste metallic?
A metallic taste often comes from reacting aluminum cans with acidic ingredients like tomatoes or lemon juice during cooking. To avoid this, transfer coconut milk to a ceramic or stainless steel bowl before mixing, or choose BPA-lined cans. Also, ensure your curry base isn’t overly acidic before adding the milk.
Can I make coconut milk from scratch for curry?
Absolutely. Grate fresh young coconut flesh and blend it with warm water. Strain through a cheesecloth. The first extraction yields thick cream; the second yields thin milk. Homemade coconut milk tastes fresher but spoils faster-use within 24 hours.
Should I add coconut milk to dry curries like Tikka Masala?
Traditional Tikka Masala uses tomato-based sauces with cream or butter, not coconut milk. Adding coconut milk changes the flavor profile significantly, moving it toward a Thai or Malabar style. If you enjoy the combination, go ahead, but understand it deviates from classic North Indian preparation.
How do I thicken a runny coconut milk curry?
Simmer uncovered to reduce excess liquid. Alternatively, mash some of the potatoes or vegetables in the curry against the side of the pot to release starch. For a quicker fix, mix 1 tsp cornstarch with 1 tbsp cold water and stir into the simmering sauce until thickened.
Next Steps and Troubleshooting Scenarios
If you’re new to cooking with coconut milk, start with a simple chicken curry using the mid-cook integration method. It’s forgiving and teaches you the basics of emulsion without high stakes. Once comfortable, experiment with Thai green curry to practice early addition and flavor melding.
For advanced cooks, try making a Malabar fish curry where timing is critical. The fish cooks quickly, so the coconut milk must be ready to go at the exact right moment. Practice tempering the milk and controlling heat to achieve a silky, non-split sauce.
Remember, cooking is iterative. If your first attempt splits, analyze what happened: Was the heat too high? Did you skip tempering? Adjust next time. With practice, you’ll develop an intuition for when that creamy, aromatic perfection hits-and your guests won’t believe you made it at home.